How to Create SPFx DevOps Pipeline
On this post, we will talk about how we can create an SPFx package using Azure DevOps Pipeline
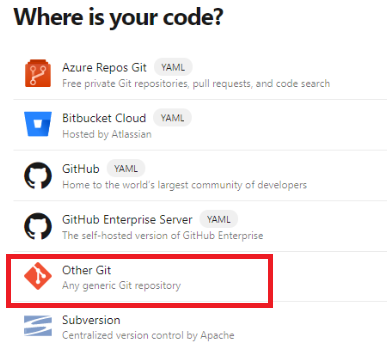
- When you create a new pipeline, select “Other Git”.
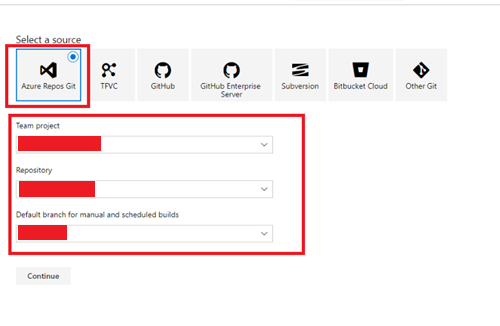
- Select “Azure Repos Git” as the source and then select where the project is located. Click on the “Continue” button
- Click Empty job when selecting a template

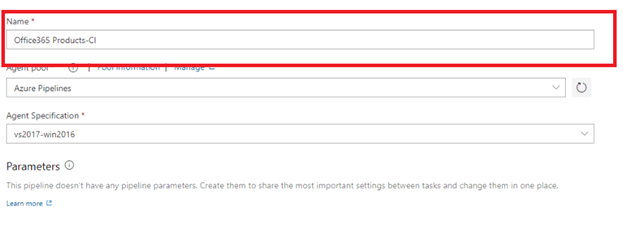
- Before adding a task on the job, set the name of the Pipeline that you are creating.
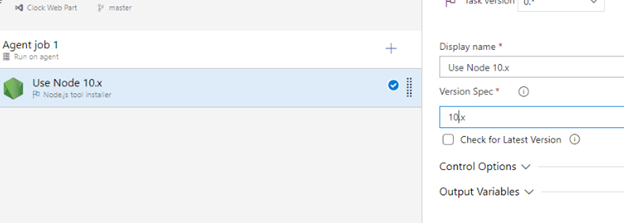
- Click on the plus sign button and search for “Node.js tool installer”, then click on add.

- Click on the Node task and change the version to 10.x
- Add npm task on the job
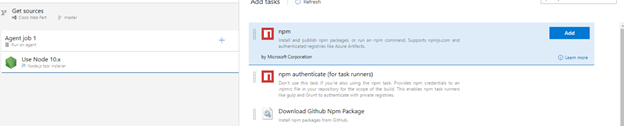
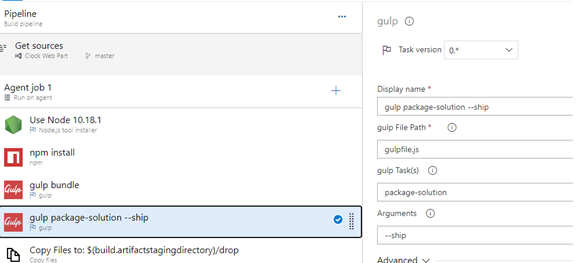
- After adding the npm task, we will now add the gulp task
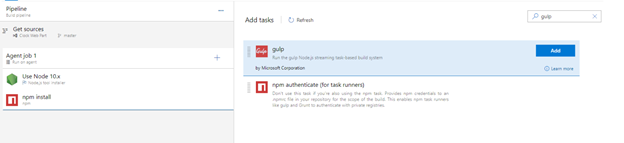
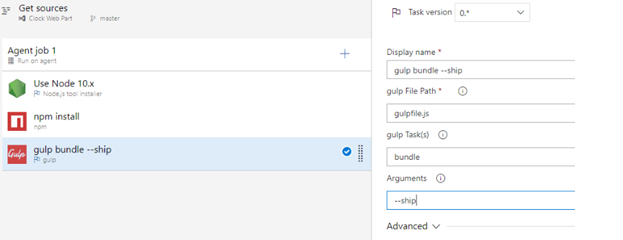
- Configure the gulp task added and make sure it has the following settings:
- Gulp Task(s): bundle
- Arguments: –ship
- Add another gulp task to package the solution, this task should have the following settings:
- Gulp Task(s): package-solution
- Arguments: –ship
- Now we are ready to copy the files to drop, add another task by searching for “Copy files”
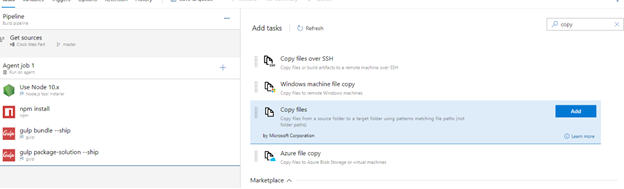
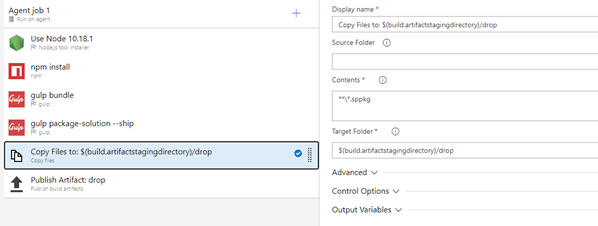
- Select the copy files task and put the following properties:
- Contents: **\*.sppkg
- Target Folder: $(build.artifactstagingdirectory)/drop
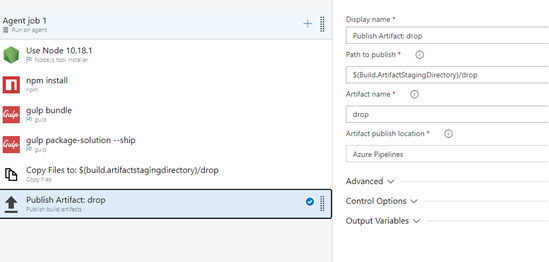
- The last task that we need to add is the “Publish Artifact”. After adding it, add the following on the properties:
- Path to publish: $(Build.ArtifactStagingDirectory)/drop
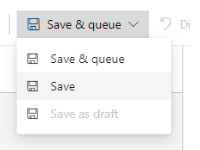
- After adding the last task, click on Save & queue
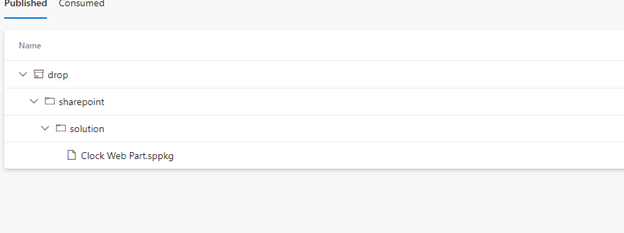
- After finishing the build, click on the agent job then click on the artifact produced.

- After clicking on the artifact, you will be able to see the package/sppkg file produced.